
Easy Apple Pie Bars with Streusel
Apple pie is one of those desserts everyone loves in theory but fewer people actually make, because rolling out pastry, crimping edges, and worrying about a soggy bottom can feel like a lot of work for a Tuesday night. Apple pie bars solve all of that. They have everything you love about apple pie — the buttery crust, the warmly spiced apples, the sweet crunch on top — but they are made in a single rectangular pan, sliced into squares, and eaten with your hands or a fork, no pastry skills required.
I first made these bars on a rainy autumn afternoon when I had a bag of apples that needed using up and a sudden craving for something warm and cinnamon-scented from the oven. I did not have the patience for a full pie that day, so I pressed a shortbread crust into a pan, piled on sliced apples tossed with sugar and spice, and scattered a buttery streusel over the top. An hour later, the kitchen smelled like the best kind of autumn, and the bars were gone before they had properly cooled. My family has been asking for them ever since, usually the moment the first apples of the season appear.
What I love about this recipe is how straightforward it is. The crust and the streusel topping are made from the same mixture — you press two-thirds of it into the pan for the base and crumble the rest over the top — so there is very little extra work involved. The apple filling is just sliced apples tossed with sugar, cinnamon, and a little flour and lemon juice. There is no pre-cooking the filling, no blind baking, and no pastry to roll. If you can stir butter into flour and slice an apple, you can make these bars.
They are also wonderfully versatile. Serve them warm with a scoop of vanilla ice cream for dessert, pack them cold in a lunchbox, or take a whole pan to a bake sale or a potluck, where they will disappear faster than almost anything else on the table. They keep well, they travel well, and they freeze well, which makes them one of the most useful bakes in my collection. Whether you are an experienced baker or someone who has never made a pie in your life, these bars are a guaranteed success — let me show you how they come together.
Why You’ll Love This Recipe
The first thing you will love is how easy these bars are compared with a traditional apple pie. There is no pastry to roll, no pie dish to line, no lattice to weave, and no worrying about whether the bottom crust has cooked through. You press the crust into the pan with your fingers, pile on the apples, scatter the streusel, and put the whole thing in the oven. The method is so simple that even a complete beginner can make these bars successfully on the first try, and that is a rare thing in baking.
The second reason is the flavour and texture. The shortbread base is buttery and tender, the apple layer is soft and warmly spiced with cinnamon and nutmeg, and the streusel topping bakes up golden and crunchy, with little buttery clumps that are honestly the best part. Each bite gives you all three layers at once — crisp, soft, and crumbly — in a way that a slice of pie never quite manages. A drizzle of salted caramel or a spoonful of whipped cream takes them over the top, but they are just as good plain.
These bars are also incredibly practical. They slice neatly into squares, so they are perfect for lunchboxes, bake sales, picnics, and parties, where a whole pie would be awkward to serve. They keep for days at room temperature or in the fridge, and they freeze beautifully, so you can bake a batch on a Sunday and enjoy them all week. And because they use everyday pantry ingredients and a few apples, they are the kind of bake you can make on a whim, without a special trip to the shops.
Finally, they are endlessly adaptable. Use whatever apples you have — a mix of sweet and tart works best — and adjust the sugar to suit their sweetness. Add a handful of chopped pecans or walnuts to the streusel for crunch, swap in pears for half the apples, or add a pinch of ginger or cardamom to the spice mix. Once you know the basic method, you can make these bars your own, and they will still turn out beautifully every single time.
Ingredients You’ll Need
- For the crust and streusel:
- 250 g (about 2 cups) plain flour
- 150 g (about 2/3 cup) cold unsalted butter, cut into small cubes
- 100 g (about 1/2 cup) granulated sugar
- 50 g (about 1/4 cup) light brown sugar
- 1 teaspoon baking powder
- 1/2 teaspoon fine sea salt
- 1 teaspoon ground cinnamon
- 1 large egg yolk
- 1 teaspoon vanilla extract
- For the apple filling:
- 4 medium apples (about 600 g), peeled, cored, and thinly sliced
- 50 g (about 1/4 cup) granulated sugar
- 2 tablespoons plain flour
- 1 tablespoon lemon juice
- 1 1/2 teaspoons ground cinnamon
- 1/4 teaspoon ground nutmeg
- 1/4 teaspoon ground ginger
- 1 pinch fine sea salt
- Optional: 50 g chopped pecans or walnuts, for the streusel
How to Make Easy Apple Pie Bars with Streusel
Start by heating the oven to 190°C (170°C fan / 375°F) and lining a 20 x 30 cm (8 x 12 inch) baking pan with baking paper, leaving a little overhang on the two long sides. That overhang is important — it acts as handles that let you lift the whole slab of bars out of the pan later, which makes slicing them so much easier. Lightly grease the paper, or give it a quick spray with cooking oil, so nothing sticks. While the oven heats, peel, core, and thinly slice the apples, aiming for slices about 3 mm thick so they cook through evenly in the oven.
Make the crust and streusel mixture next. In a large bowl, whisk together the flour, granulated sugar, brown sugar, baking powder, salt, and cinnamon. Add the cold cubed butter and rub it into the flour with your fingertips, lifting and crumbling the mixture as you go, until it looks like coarse breadcrumbs with a few pea-size pieces of butter still visible. Those little pieces of butter are important — they melt in the oven and create the tender, shortbread-like texture of the crust. Stir in the egg yolk and vanilla extract, then use your hands to bring the mixture together into a crumbly dough that holds together when you squeeze it but still breaks apart easily.
Tip about two-thirds of the mixture into the lined pan and press it firmly and evenly across the base with your fingers or the bottom of a glass. Press it right into the corners and make the layer as even as you can — an uneven base bakes unevenly, and you want every bar to have the same buttery foundation. Set the remaining third aside in the bowl; this will become your streusel topping. If you are adding nuts, stir them into this reserved portion now. Put the pan in the fridge for ten minutes while you prepare the filling — chilling the base helps it hold its shape and bake up crisp rather than soft.
For the filling, toss the sliced apples in a large bowl with the sugar, flour, lemon juice, cinnamon, nutmeg, ginger, and salt. The flour might seem like an odd addition, but it absorbs the juices the apples release as they bake, so the filling sets into a soft, sliceable layer instead of a watery one. The lemon juice keeps the apples from browning and adds a bright note that balances the sweetness. Toss everything gently but thoroughly, so every slice is coated.
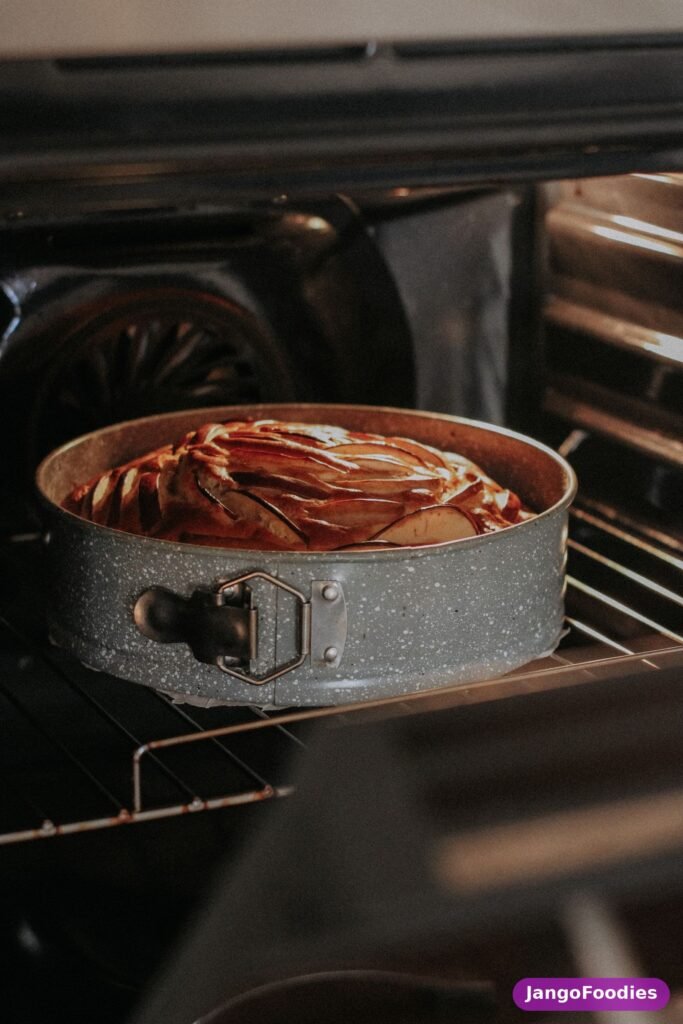
Take the pan out of the fridge and arrange the apple slices over the base in an even layer, overlapping them slightly and pressing them down gently. It will look like a lot of apples, and it is — but they shrink considerably as they bake, so pile them generously. Scatter the reserved streusel mixture evenly over the top, breaking up any large clumps with your fingers but leaving plenty of pea-size pieces, because those are the bits that bake up crunchiest. Bake for 40 to 45 minutes, until the streusel is golden brown, the edges are bubbling gently, and the apples are tender when you poke them with a skewer or a thin knife.
Let the bars cool in the pan for at least an hour before you try to slice them. I know this is the hardest part of the recipe — the smell is wonderful and you will want to dig in immediately — but cutting them while they are hot will make them fall apart, because the filling needs time to set. Once they are completely cool, use the paper overhang to lift the whole slab out of the pan and onto a chopping board, then slice into twelve or sixteen squares with a sharp knife, wiping the blade between cuts for neat edges. Serve at room temperature, or warm them gently for dessert. If you love this kind of simple, sliceable bake, this easy cinnamon coffee cake is another wonderful option — it has the same warm spice and crumbly topping, and it slices just as neatly.
Tips for Perfect Apple Pie Bars
Choosing the right apples makes a real difference. You want apples that hold their shape when baked rather than turning to mush — Granny Smith, Braeburn, Honeycrisp, and Jonagold are all excellent choices. A mix of one tart apple and one sweet apple gives the best flavour, because the tartness balances the sugar in the filling. Avoid very soft apples like Red Delicious, which tend to collapse into applesauce in the oven. Slice the apples thinly and evenly, about 3 mm, so they all cook at the same rate.
Keep the butter cold when you make the crust mixture. Cold butter rubbed into flour creates little pockets that melt in the oven, giving the base its tender, shortbread-like texture. If the butter softens too much while you are rubbing it in, the mixture will turn greasy and the crust will be tough rather than crumbly. If your kitchen is warm, pop the cubed butter in the freezer for ten minutes before you start, and work quickly. If the mixture ever feels warm and sticky, put the whole bowl in the fridge for ten minutes before pressing it into the pan.
Do not skip chilling the base before baking. Ten minutes in the fridge firms up the butter and helps the crust bake crisp instead of soft and soggy. It is a small step, but it makes a noticeable difference to the final texture. The same principle applies to the finished bars: let them cool completely before slicing, or the filling will ooze out and the base will crumble. An hour of cooling is the minimum, and two hours is even better.
Press the base firmly and evenly into the pan, right into the corners. A loosely pressed base will crumble when you slice the bars, while a firmly pressed one holds together beautifully. Use the bottom of a flat glass or a measuring cup to press it down evenly — it is faster and more even than using your fingers alone. And when you scatter the streusel, leave the pieces irregular: a mix of fine crumbs and pea-size clumps gives you the best crunch.
Finally, watch the baking time rather than relying on it blindly. Ovens vary, and the bars are done when the streusel is golden, the edges are bubbling, and a skewer slides easily into the apples. If the top starts browning too quickly, cover the pan loosely with foil for the last ten minutes. The bars will firm up considerably as they cool, so do not worry if they look a little soft when they first come out of the oven.
Variations to Try
Swap half the apples for pears for a lovely autumn variation — pears bring a softer, more floral sweetness that pairs beautifully with the cinnamon. Or add a cup of fresh or frozen cranberries to the apple filling for a tart, jewel-like contrast that is perfect for the holidays. A handful of raisins or dried cranberries stirred into the filling adds little chewy bursts of sweetness, and a spoonful of mincemeat mixed through the apples turns these into something very festive indeed.
Change the streusel to suit your taste. Chopped pecans or walnuts add crunch and a lovely nutty flavour, while a handful of rolled oats stirred into the streusel gives it a heartier, crumblier texture. A pinch of cardamom or ground ginger in the streusel mixture adds warmth, and a tablespoon of demerara sugar scattered over the top before baking gives the bars a beautiful sparkle and extra crunch.
For a salted caramel version, drizzle a few tablespoons of salted caramel sauce over the apples before you add the streusel, and drizzle a little more over the finished bars before serving. The sweet-salty combination with the spiced apples is genuinely irresistible. You can also add a thin layer of cream cheese filling between the base and the apples — beat 150 g of softened cream cheese with an egg yolk, two tablespoons of sugar, and a teaspoon of vanilla, spread it over the base, then add the apples on top. It turns the bars into something closer to a cheesecake, and it is wonderful.
Make them gluten-free by swapping the plain flour for a good gluten-free flour blend — look for one that contains xanthan gum — and check that your baking powder is gluten-free. The method stays exactly the same, and the bars turn out just as well. For a dairy-free version, use a firm plant-based butter in the crust and streusel; the texture will be slightly different but still delicious. And if you want another elegant dessert to round out a baking session, this classic vanilla bean panna cotta is a beautiful, make-ahead choice that pairs wonderfully with these bars on a dessert table.
Serving Ideas
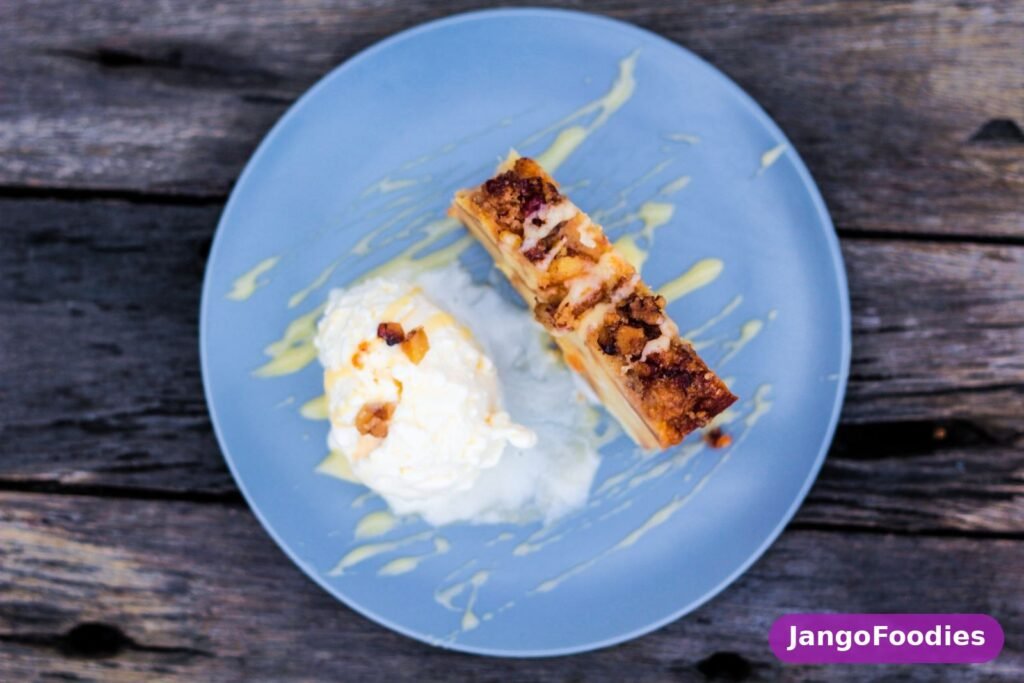
The simplest way to serve these bars is at room temperature, cut into squares and arranged on a plate, with nothing more than a cup of tea or coffee. They are perfect for an afternoon treat, a lunchbox, or a bake sale, and they need no accompaniment at all — the buttery crust, spiced apples, and crunchy topping are a complete experience on their own. For a casual gathering, pile them on a cake stand and let people help themselves; they will disappear quickly.
For dessert, warm the bars gently in a low oven or in the microwave for twenty seconds, and serve them with a scoop of vanilla ice cream or a dollop of softly whipped cream. The contrast of the warm, spiced apples with the cold ice cream is one of the great simple pleasures in life, and a drizzle of salted caramel sauce or a spoonful of custard takes it even further. A glass of dessert wine or a mug of spiced cider alongside makes it feel like a proper autumn occasion.
These bars also make a lovely addition to a dessert buffet. Serve them alongside other bakes, and guests can try a little of everything. They pair especially well with soft, chewy cookies — these easy oatmeal cookies without eggs are a wonderful companion on the same table, and they are just as easy to make in a big batch. For a holiday dessert spread, add a pie or two, and you have a table that will make everyone happy.
Storage and Reheating
Store the bars in an airtight container at room temperature for two to three days, or in the fridge for up to five days. They actually taste even better on the second day, once the flavours have had time to settle together and the spices have mellowed into the apples. If you store them in the fridge, let them come to room temperature for twenty minutes before serving, or warm them briefly — the base firms up when cold and is at its best when it is not fridge-cold.
To reheat, warm individual bars in the microwave for fifteen to twenty seconds, or warm the whole slab in a low oven at 160°C (320°F) for ten minutes. The streusel will crisp up again in the oven, which is the best way to revive bars that have been in the fridge for a few days. Avoid reheating them more than once, and do not microwave them for too long, or the apples will go soft and the base will lose its crispness.
These bars freeze beautifully for up to three months. Slice them first, then wrap each bar individually in cling film and place them in a freezer bag, or freeze the whole uncut slab wrapped tightly in foil. Thaw overnight in the fridge or for an hour at room temperature, then warm gently if you like. The streusel stays surprisingly crisp after freezing, especially if you reheat the bars in the oven for a few minutes. If you want to compare techniques, the BBC Good Food apple pie bars recipe is a good reference, and King Arthur Baking’s apple pie bars shows a slightly different approach to the same idea.
Frequently Asked Questions
What are the best apples for apple pie bars?
Use firm apples that hold their shape when baked — Granny Smith, Braeburn, Honeycrisp, and Jonagold are all excellent. A mix of one tart and one sweet variety gives the best flavour, because the tartness balances the sugar in the filling. Avoid soft apples like Red Delicious, which tend to collapse into a mushy filling. Slice them thinly and evenly, about 3 mm thick, so they cook through at the same rate and the bars slice neatly.
Can I make apple pie bars ahead of time?
Yes, they are a great make-ahead bake. They keep at room temperature for two to three days and in the fridge for up to five days, and they actually taste better on the second day once the flavours have settled. You can also freeze the sliced bars for up to three months — wrap each one individually, thaw overnight in the fridge, and warm gently before serving. They are ideal for bake sales, parties, and holiday baking for exactly this reason.
Why did my bars fall apart when I sliced them?
The most common reason is cutting them while they are still warm. The filling needs time to set as it cools, and the base needs time to firm up — slicing too early will make the bars crumble and the filling ooze out. Let them cool in the pan for at least an hour, and preferably until completely cool. Using the baking paper overhang to lift the whole slab out before slicing also helps, as does wiping the knife clean between cuts.
Can I use a different pan size?
You can, but the baking time will change. A smaller pan will give you thicker bars that need longer in the oven — add five to ten minutes and check that the apples are tender. A larger pan will give thinner bars that bake faster, so start checking at thirty-five minutes. Whatever pan you use, line it with baking paper with an overhang, and make sure the base layer is pressed evenly across the whole pan so the bars bake uniformly.
Can I make these bars gluten-free?
Yes. Swap the plain flour for a good gluten-free flour blend that contains xanthan gum, and check that your baking powder is gluten-free. The method stays exactly the same, and the bars turn out just as well — the base will be slightly more delicate, so let them cool completely before slicing. You can also make a dairy-free version by using a firm plant-based butter in place of the regular butter.
How do I keep the streusel topping crunchy?
The key is cold butter and irregular pieces. Rub the butter into the flour until you have a mix of fine crumbs and pea-size clumps, and do not overwork it — the bigger clumps are what bake up crunchiest. Bake the bars until the streusel is properly golden, not just pale, and let them cool completely before storing. Store them in an airtight container at room temperature rather than the fridge if you can, and if they do soften after a few days, a few minutes in a low oven will crisp the topping right back up. For another dessert that is just as easy to slice and share, this classic key lime pie cuts into beautiful clean wedges and is always a crowd-pleaser.