

Classic Vanilla Bean Panna Cotta
Panna cotta has a reputation for being a fancy restaurant dessert, the kind of thing you order on a special occasion and would never dream of making at home. I used to think exactly the same thing, until a friend showed me how it was made one afternoon and I realised I had been completely wrong. It is, quite honestly, one of the easiest desserts you will ever make: warm cream, a little sugar, a vanilla bean, and gelatine. Stir, pour, chill, and you are done. There is no baking, no whisking egg whites, no water bath, and no chance of it collapsing in the oven — because there is no oven involved at all.
The first time I made it, I was cooking dinner for friends and wanted a dessert that looked impressive but would not keep me in the kitchen while everyone else was relaxing. I made the panna cotta in the morning, popped it in the fridge, and forgot about it until dessert time. When I turned those little white domes out onto plates and spooned over some macerated strawberries, my friends genuinely thought I had bought them from a patisserie. That is the magic of panna cotta: it looks like you tried very hard, when in fact you barely tried at all.
What makes a good panna cotta is not complicated technique but good ingredients and a gentle hand. Real vanilla — a split bean with its tiny black seeds, or a good vanilla bean paste — gives it a warmth and depth that vanilla extract alone cannot quite match. The cream should be full-fat, because the richness is the whole point, and the gelatine needs to be measured carefully: too much and the dessert turns rubbery, too little and it will not hold its shape. Get those two things right and you will have a dessert that trembles gently on the spoon, melts on the tongue, and tastes like the most elegant version of cream and vanilla you can imagine.
This recipe makes six individual servings, which is perfect for a dinner party, but it scales up or down easily. It needs at least four hours in the fridge, and it is even better made the day before, which makes it one of the most stress-free desserts in my whole collection. Serve it with fresh berries, a spoonful of berry sauce, a drizzle of honey, or nothing at all — it is beautiful in its simplicity. Let me walk you through it, step by step, and I promise you will wonder why you ever thought it was difficult.
Why You’ll Love This Recipe
The first reason to love panna cotta is how little effort it takes. The active cooking time is about ten minutes — you warm the cream, dissolve the gelatine, stir in the vanilla, and pour it into moulds. That is genuinely the whole recipe. The fridge does the rest. If you can make a cup of tea, you can make panna cotta, and I mean that sincerely. It is the perfect dessert for anyone who feels nervous about baking, because there is nothing to rise, nothing to brown, and nothing to go wrong in the oven.
The second reason is the texture, which is unlike any other dessert. A properly made panna cotta is not firm like a jelly and not soft like a mousse — it sits somewhere in between, with a delicate wobble that holds its shape on the plate and then melts almost instantly on the tongue. It is cool, silky, and barely sweet, which makes it the perfect ending to a rich meal. After a heavy main course, when nobody has room for a slice of cake, a light panna cotta with berries is exactly right.
It is also one of the best make-ahead desserts you can make. Panna cotta needs at least four hours to set, and it keeps beautifully in the fridge for two to three days, so you can make it well before your guests arrive and forget about it completely. That makes it ideal for dinner parties, holiday meals, and any occasion when you want dessert sorted before the cooking even starts. You can even make it in pretty glasses or jars and serve it straight from the fridge, which skips the unmoulding step entirely.
Finally, it is endlessly versatile. The base recipe is a blank canvas: swap the vanilla for coffee, chocolate, or citrus; top it with berries, caramel, chocolate sauce, or poached fruit; serve it in moulds, glasses, or teacups. Once you know the method, you can adapt it to any season and any occasion, from summer berries to winter poached pears. It is a recipe that earns its place in your permanent collection.
Ingredients You’ll Need
- 500 ml (about 2 cups) double cream
- 120 ml (about 1/2 cup) whole milk
- 75 g (about 1/3 cup plus 1 tablespoon) caster sugar
- 1 vanilla bean, split lengthways and seeds scraped out (or 2 teaspoons vanilla bean paste)
- 2 1/4 teaspoons powdered gelatine (about 1 sachet, 7 g)
- 3 tablespoons cold water
- 1 pinch fine sea salt
- 1/2 teaspoon vanilla extract, optional, for extra depth
- To serve: fresh berries, berry sauce, or macerated strawberries
- For the berry topping (optional): 200 g mixed berries, 2 tablespoons caster sugar, 1 tablespoon lemon juice
How to Make Classic Vanilla Bean Panna Cotta
Start by blooming the gelatine, which is the one step you must not skip. Sprinkle the powdered gelatine evenly over the cold water in a small bowl — do not dump it in a heap, or it will clump — and leave it to sit for five minutes. It will swell up and turn spongy, like a little gelatine sponge. This step, called blooming, makes sure the gelatine dissolves smoothly into the warm cream later instead of forming lumps. While it blooms, lightly oil six ramekins or dariole moulds with a flavourless oil, wiping out any excess with kitchen paper so only the thinnest film remains. This will help the panna cotta release cleanly later.
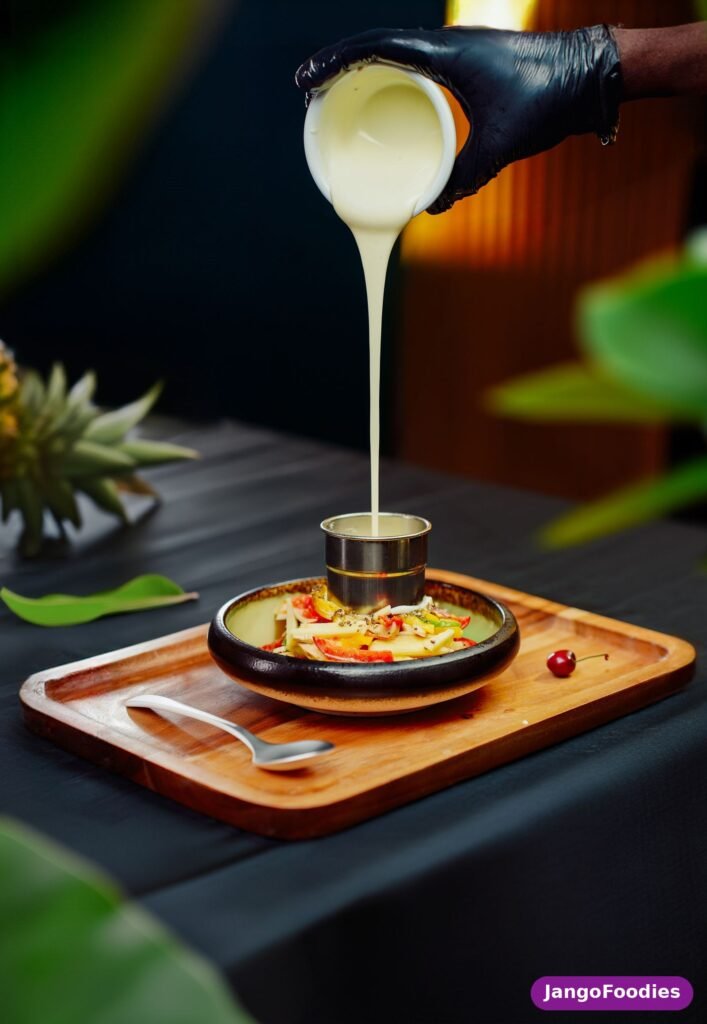
Pour the cream and milk into a medium saucepan and add the caster sugar and the pinch of salt. Split the vanilla bean lengthways with a small sharp knife, scrape out the tiny black seeds with the tip of the knife, and add both the seeds and the empty pod to the pan — the pod still holds plenty of flavour and will infuse the cream as it warms. If you are using vanilla bean paste instead, simply stir it in. Place the pan over medium-low heat and warm the cream gently, stirring now and then, until the sugar has dissolved and the cream is hot and steaming. You are looking for small bubbles forming around the edge of the pan, but do not let it come to a rolling boil. Boiling the cream can change the texture and dull the vanilla, so keep the heat gentle and stay nearby — this only takes about five minutes.
Take the pan off the heat and lift out the vanilla pod with a fork. Add the bloomed gelatine to the hot cream and stir gently for about a minute until it has dissolved completely. To check, lift the spoon and look at the back of it — there should be no grains or lumps at all, just smooth cream. If you see any stubborn bits, return the pan to the lowest heat for thirty seconds and stir again, but do not let it boil. Stir in the vanilla extract if you are using it, then let the mixture cool for ten to fifteen minutes, stirring occasionally, until it is warm rather than hot. This cooling step matters: if you pour very hot cream into the moulds, the vanilla seeds will sink to the bottom and the panna cotta can develop a skin. Lukewarm cream gives a more even, professional-looking result.
Pour the mixture evenly into your prepared ramekins, dividing it as evenly as you can. If you like, strain it through a fine sieve as you pour — this catches any tiny lumps of gelatine or vanilla pod fibres and gives you the silkiest possible texture. It is an optional step, but it is the difference between a good panna cotta and a great one. Cover each ramekin loosely with cling film, or place them all on a tray and cover the tray, then transfer them carefully to the fridge. Leave them to set for at least four hours, and preferably overnight. The longer they chill, the more cleanly they will unmould.
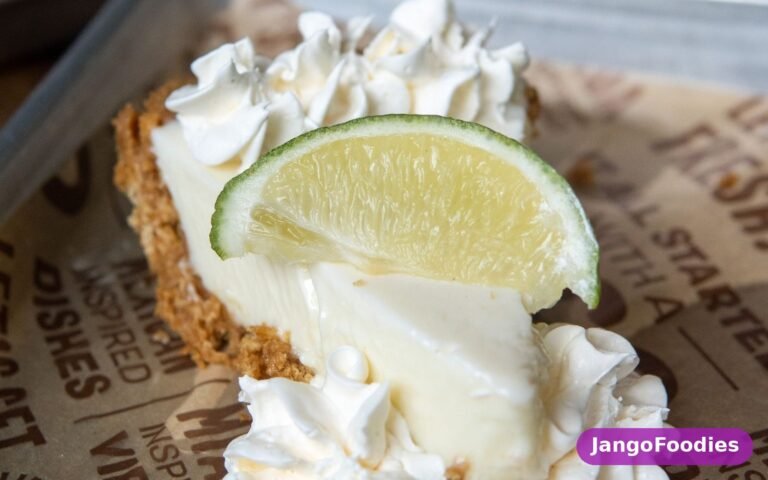
To serve, make the berry topping if you are using it: toss the berries with the sugar and lemon juice and leave them to macerate for twenty to thirty minutes until they release their juices and turn glossy. To unmould the panna cotta, dip each ramekin briefly — about five seconds — in a bowl of hot water, then run a thin knife gently around the edge. Place a serving plate on top, flip the whole thing over in one confident motion, and give the ramekin a gentle shake. The panna cotta should slide out with a satisfying little wobble. If it does not release, dip it in the hot water for another few seconds and try again. Spoon the berries and their juices over the top and serve immediately, while the panna cotta is still cool and trembling. If you would rather skip the unmoulding entirely, set the panna cotta in pretty glasses or small jars instead and spoon the berries on top — it looks just as lovely and there is nothing to turn out. For another make-ahead dessert that impresses without stress, this classic key lime pie is a wonderful choice, with the same chill-and-serve ease.
Tips for Perfect Vanilla Bean Panna Cotta
The gelatine is the heart of this recipe, so getting it right matters more than anything else. Measure it carefully — too much gelatine is the single most common reason panna cotta turns rubbery and firm instead of delicate and wobbly. Two and a quarter teaspoons of powdered gelatine to 620 ml of liquid is the ratio I use, and it gives a texture that holds its shape but still trembles on the plate. If you are using gelatine leaves instead of powder, three leaves soaked in cold water for five minutes, then squeezed out, will do the same job. Always bloom powdered gelatine in cold water, never hot, and always dissolve it in warm — not boiling — cream.
Never let the cream boil. A gentle heat is all you need to dissolve the sugar and infuse the vanilla. Boiling can scorch the cream, dull the vanilla flavour, and affect how the gelatine sets. Keep the heat on medium-low, stir occasionally, and take the pan off the heat as soon as you see steam and small bubbles at the edges. The whole warming step takes about five minutes, and it is worth staying at the stove to watch it rather than wandering off.
Let the mixture cool slightly before pouring it into the moulds. Pouring very hot cream into cold ramekins can cause the vanilla seeds to sink to the bottom, leaving you with a speckled base and a plain top. Ten to fifteen minutes of cooling, with an occasional stir, is enough. Straining the mixture through a fine sieve as you pour is another small step that makes a big difference — it catches any undissolved gelatine or stray vanilla fibres and guarantees a perfectly smooth finish.
Be patient with the setting time. Four hours is the minimum, and overnight is genuinely better. A panna cotta that has only just set will be soft and may collapse when you try to unmould it, while one that has chilled overnight will release cleanly and hold its shape beautifully. If you are in a rush, the freezer is not a shortcut — freezing changes the texture and can make the panna cotta grainy. Plan ahead, make it the day before, and let the fridge do the work.
When it comes to unmoulding, the hot water dip is your best friend. Five seconds is usually enough; ten seconds at most. If you leave the ramekin in the hot water too long, the outside of the panna cotta will melt and lose its shape. Dip, run a knife around the edge, flip, and shake gently. If it resists, dip again for a few seconds rather than forcing it. And remember — serving in glasses is always a perfectly good option. Nobody will think less of a panna cotta served in a beautiful glass with berries on top.
Variations to Try
For a coffee panna cotta, dissolve two teaspoons of instant espresso powder into the warm cream along with the sugar. The coffee flavour is subtle and sophisticated, and it pairs beautifully with a drizzle of chocolate sauce or a few chocolate-covered coffee beans on top. For a chocolate version, whisk three tablespoons of cocoa powder into the sugar before adding the cream, and stir in 50 g of finely chopped dark chocolate while the cream is warm so it melts in. Serve it with whipped cream and a dusting of cocoa.
Citrus panna cotta is lovely in spring and summer. Add the finely grated zest of one lemon or orange to the cream as it warms, and serve with a spoonful of lemon curd or a pile of fresh berries. A coconut version is just as easy: replace the milk with coconut milk and the cream with half cream and half coconut cream, and top with toasted coconut flakes and mango. The method stays exactly the same for all of these — only the flavourings change.
You can also play with the toppings. A spoonful of salted caramel sauce turns panna cotta into something truly indulgent, and a simple honey drizzle with toasted pistachios is elegant and easy. In autumn, try poached pears or stewed plums; in winter, a spoonful of cranberry sauce works surprisingly well. A swirl of fruit coulis — raspberries or passion fruit blended with a little sugar and strained — looks stunning on the plate and takes five minutes to make.
For a dairy-free version, use full-fat coconut milk in place of the cream and milk, and check that your gelatine is suitable — agar-agar can be used instead, though you will need to follow the packet instructions carefully, as it sets differently and more firmly than gelatine. The result is a little lighter but still creamy and delicious. If you enjoy simple, small-batch desserts like this one, these small-batch chocolate chip cookies without brown sugar are another favourite — they bake in minutes and are perfect when you only want a few cookies, not a whole tray.
Serving Ideas
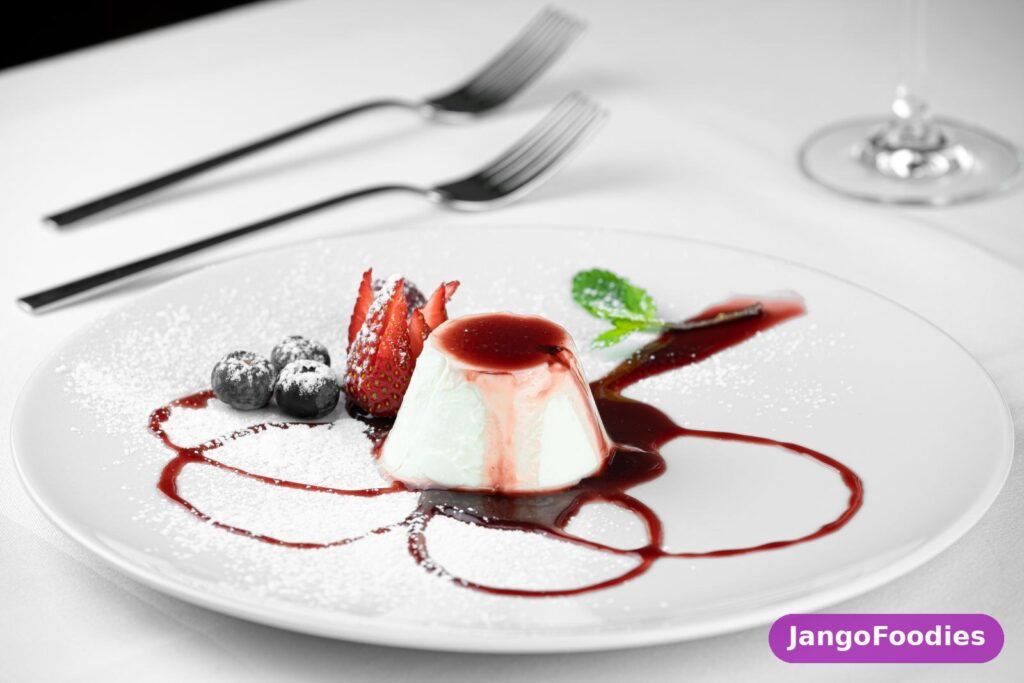
The classic way to serve panna cotta is unmoulded onto a plate with fresh berries and their juices, and honestly, it is hard to improve on that. The tartness of the berries cuts through the richness of the cream, and the colours look beautiful against the white panna cotta. In summer, use strawberries, raspberries, and blueberries; in winter, try a spoonful of stewed rhubarb or poached pears. A single perfect strawberry and a mint leaf is all you need if you want to keep it minimal and elegant.
For a dinner party, set the panna cotta in individual glasses and layer it with berry coulis, so guests can see the pretty layers through the glass. Or serve it in small teacups with a shortbread biscuit on the side — the contrast of the cool, silky panna cotta with a crisp, buttery biscuit is wonderful. A dessert wine or a glass of prosecco alongside makes it feel like a real occasion, and a pot of good coffee afterwards is the perfect finish.
Panna cotta also works beautifully as part of a larger dessert spread. Make a batch alongside a tray of cookies and a fruit platter, and let guests help themselves — the panna cotta provides the elegant, creamy element while the cookies bring the crunch. These easy oatmeal cookies without eggs are a lovely companion on a dessert table, soft and chewy and easy to make in a big batch. However you serve it, keep the panna cotta cold until the last moment — it is at its best straight from the fridge.
Storage and Reheating
Panna cotta keeps in the fridge for two to three days, covered, in its moulds or glasses. It is best eaten within two days, when the texture is at its silkiest, but it will still be good on day three. Keep the berry topping separate and add it just before serving, so the berries stay fresh and the juices do not stain the panna cotta. Once unmoulded, panna cotta should be served straight away — it will start to soften at room temperature, so do not leave it sitting out for more than about twenty minutes.
There is no reheating involved with panna cotta, which is part of its charm. If you need to store it, simply keep it chilled. Do not freeze panna cotta: freezing changes the texture of the gelatine and the cream, and it will turn grainy and watery when thawed. If you have made too much, it is far better to enjoy it over the next couple of days than to try to freeze it. The mixture itself, before setting, should not be stored either — once the gelatine is in, it needs to go into the moulds and into the fridge.
If you have leftover berry topping, it keeps in the fridge for two to three days in a small container and is lovely spooned over yoghurt, ice cream, or porridge. Leftover vanilla beans, once used, can be rinsed, dried, and tucked into a jar of sugar to make vanilla sugar — a lovely way to use every last bit of flavour. For a second opinion on the method, the BBC Good Food vanilla panna cotta recipe is a reliable reference, and Taste of Home’s panna cotta shows the same technique with a slightly different topping.
Frequently Asked Questions
Why is my panna cotta rubbery instead of silky?
Almost always, the answer is too much gelatine. Even a small excess can turn a delicate panna cotta firm and rubbery, so measure carefully — level teaspoons, not heaped ones — and use the ratio in this recipe: 2 1/4 teaspoons of powdered gelatine to 620 ml of liquid. Boiling the cream can also affect the texture, so keep the heat gentle. If your panna cotta has set too firmly, serve it in glasses next time with a little less gelatine, and you will get the soft, trembling texture you are after.
Can I make panna cotta without a vanilla bean?
Yes. Vanilla bean paste is the best substitute — use two teaspoons — because it contains the same tiny black seeds and gives a similar depth of flavour. Good-quality vanilla extract works too; use one tablespoon and stir it in after the cream comes off the heat, so the alcohol does not cook off and the flavour stays bright. Avoid imitation vanilla if you can, because the flavour will taste flat in a dessert where vanilla is the star.
How long does panna cotta need to set?
At least four hours in the fridge, and overnight is even better. The gelatine needs time to form a stable network, and a panna cotta that has only just set will be soft and may collapse when unmoulded. Do not try to rush it in the freezer — freezing changes the texture and can make the panna cotta grainy. Make it the day before you need it, and it will unmould cleanly and hold its shape beautifully.
Can I make panna cotta in glasses instead of moulds?
Absolutely, and it is a great option if you want to skip the unmoulding step entirely. Pour the mixture into small glasses, jars, or teacups, chill until set, and serve with berries spooned on top. It looks beautiful, there is nothing to turn out, and you can even layer it with fruit coulis for a pretty striped effect. Use glasses that hold about 120 ml each, and you will get six servings from this recipe.
Can I make panna cotta dairy-free?
Yes. Replace the cream and milk with full-fat coconut milk — use the same total volume — and the result is creamy and delicious, with a gentle coconut flavour. For a completely plant-based version, you will also need to replace the gelatine: agar-agar is the usual substitute, but it sets more firmly than gelatine, so follow the packet instructions and use a little less than you think you need. The texture will be slightly firmer than a traditional panna cotta, but still lovely.
What should I serve with panna cotta?
Fresh berries are the classic choice, and for good reason — their tartness balances the rich cream perfectly. A berry coulis, a spoonful of macerated strawberries, or a drizzle of honey all work beautifully. For something more indulgent, try salted caramel sauce or chocolate sauce. A crisp biscuit on the side, like shortbread or a thin wafer, adds a lovely contrast in texture. If you want another small-batch bake to serve alongside, these small-batch cookies without baking soda are soft, chewy, and bake in minutes.
2 Comments